Overview
This page provides the readers provide guidance to prepare Azure DevOps CI/CD for deployment to Microsoft Fabric Workspace.
Pre-requisites
This section provides an overview of the design considerations and decision made for various components of Enterprise Data platform built in Microsoft Fabric.
Subscription requirements
| Requirement No | Requirements | Description |
|---|---|---|
| REQ 1.1 | An Azure DevOps project | Create a new DevOps project or use an existing one. |
| REQ 1.2 | MS Fabric workspaces | Create dedicated Fabric workspace for Dev,Test/UAT and Prod environment |
| Service Principal | * Create a new Service principal in Azure Entra and assign a default ‘Subscription’ * Save the ClientID and Client Secret in a key Vault * Azure Subscription name and id | |
| REQ 1.3 | Fabric Security Group | * As the best practice, create a new security group in Microsoft Entra ID * Add the created service principal as a member of this security group |
| REQ 1.4 | Source Control | Create a dedicated repository within the DevOps project for Fabric artifacts and grant the service principal ‘Contributor’ access. |
| REQ 1.5 | Azure DevOps Service Connections | Create a service connection in Azure DevOps using authentication through service principal to connect to Fabric. Section 4 “Azure DevOps CI/CD Service Connection Setup Guide for Microsoft Fabric” provides details of steps. |
| REQ 1.6 | Resource with Admin access | Azure Admin – contact and email address Fabric Admin – contact and email address Azure DevOps Admin– contact and email address |
| REQ 1.7 | DevOps Build User Access | Grant nominated user admin permission on the Azure DevOps Project |
| REQ 1.8 | Key vault (Optional) |
The following sections provide details of the configuration.
User License/Subscription/Access requirements
| Requirement No | Requirements | Description |
|---|---|---|
| L-REQ 1.1 | Azure DevOps License | For the user who will configure CI/CD pipelines in Azure DevOps. |
| L-REQ 1.3 | Azure Portal Access | For the user who will provision Fabric capacity and Service Principal (SPN) in Azure. |
| L-REQ 1.4 | Fabric Capacity Admin | For the user who will assign capacity to users or workspace |
| L-REQ 1.5 | Fabric Admin | For the user who will update Fabric tenant level settings in Fabric/PowerBI portal |
Set Up Environments in DevOps
Creating the Environments (DEV, UAT, PROD)
1. Environments in Azure DevOps represent the resources (like VMs, Kubernetes clusters, or services) where your application is deployed.
2. Navigate to your Azure DevOps project.
3. In the left-hand navigation menu, click on Pipelines.
4. Click on Environments.
5. Click the New environment button.
6. Create the DEV Environment:
- Name: DEV
- Resource: Select None
- Click Create.
7. Repeat the process for the remaining two environments:
- Name: UAT
- Name: PROD
You should now see three new environments listed: DEV, UAT, and PROD.
Creating the Variable Groups (Dev, UAT, Production)
Variable Groups are a collection of variables that you can use across multiple pipelines and stages.
1. In the left-hand navigation menu, under Pipelines, click on Library.
2. Click the + Variable group button.
3. Create the Dev Variable Group:
- Variable group name: Dev
- Description: (Optional) Variable group for Development environment.
- Add Variables:
- Click + Add.
- Name: FABRIC_ENVIRONMENT
- Value: development
- Click + Add.
- Name: IS_SINGLE_WORKSPACE
- Value: Y
- Click Save.
Repeat for UAT and Production
Repeat the process to create the remaining two variable groups, ensuring the FABRIC_ENVIRONMENT variable is set correctly for each.
| Variable Group Name | Variable | Value |
| UAT | FABRIC_ENVIRONMENT | UAT |
| IS_SINGLE_WORKSPACE | Y | |
| Production | FABRIC_ENVIRONMENT | production |
| IS_SINGLE_WORKSPACE | Y |
Once finished, you will have three separate Variable Groups (Dev, UAT, Production) and three separate Environments (DEV, UAT, PROD). You can now link these Variable Groups to the corresponding stages in your YAML or Classic pipelines.
Azure DevOps CI/CD Service Connection Setup Guide for Microsoft Fabric
This guide outlines the mandatory steps to configure a Service Connection in Azure DevOps, using a Service Principal, for deploying code to Microsoft Fabric via the Fabric CICD deployment library.
The process is divided into four main configuration phases:
Phase 1: Create and Configure the Service Principal (Microsoft Entra ID)
You must first register an application in Microsoft Entra ID (Azure AD) to create the Service Principal (SPN) identity that the DevOps pipeline will use.
| Step | Action | Details |
| 1.1 | Register a New Application | Navigate to the Azure Portal → Microsoft Entra ID → App registrations → New registration. Give it a meaningful name (e.g., fabric-cicd-spn). |
| 1.2 | Capture Credentials | After creation, note down the following required values for the Service Connection: Application (client) ID (Service Principal ID) Directory (tenant) ID (Tenant ID) |
| 1.3 | Create a Client Secret | Go to Certificates & secrets → Client secrets → New client secret. Set an appropriate expiry (e.g., 1 or 2 years). Immediately copy the Secret Value (not the Secret ID), as it will be masked after you leave the page. |
| 1.4 | Configure API Permissions | Go to API permissions → Add a permission → Fabric BI Service (or search for the relevant Fabric API scope if explicitly available). Choose Application permissions (required for Service Principal/non-interactive calls). Select the following minimum required permission: OneLake.ReadWrite.All, Tenant.ReadWrite.All (Recommended for general Fabric deployment and CI/CD operations) OR Workspace.ReadWrite.All (If you only need to manage content within assigned workspaces). Mandatory: After selecting the permissions, click Grant admin consent for [Your Tenant Name] to activate the Application Permissions. |
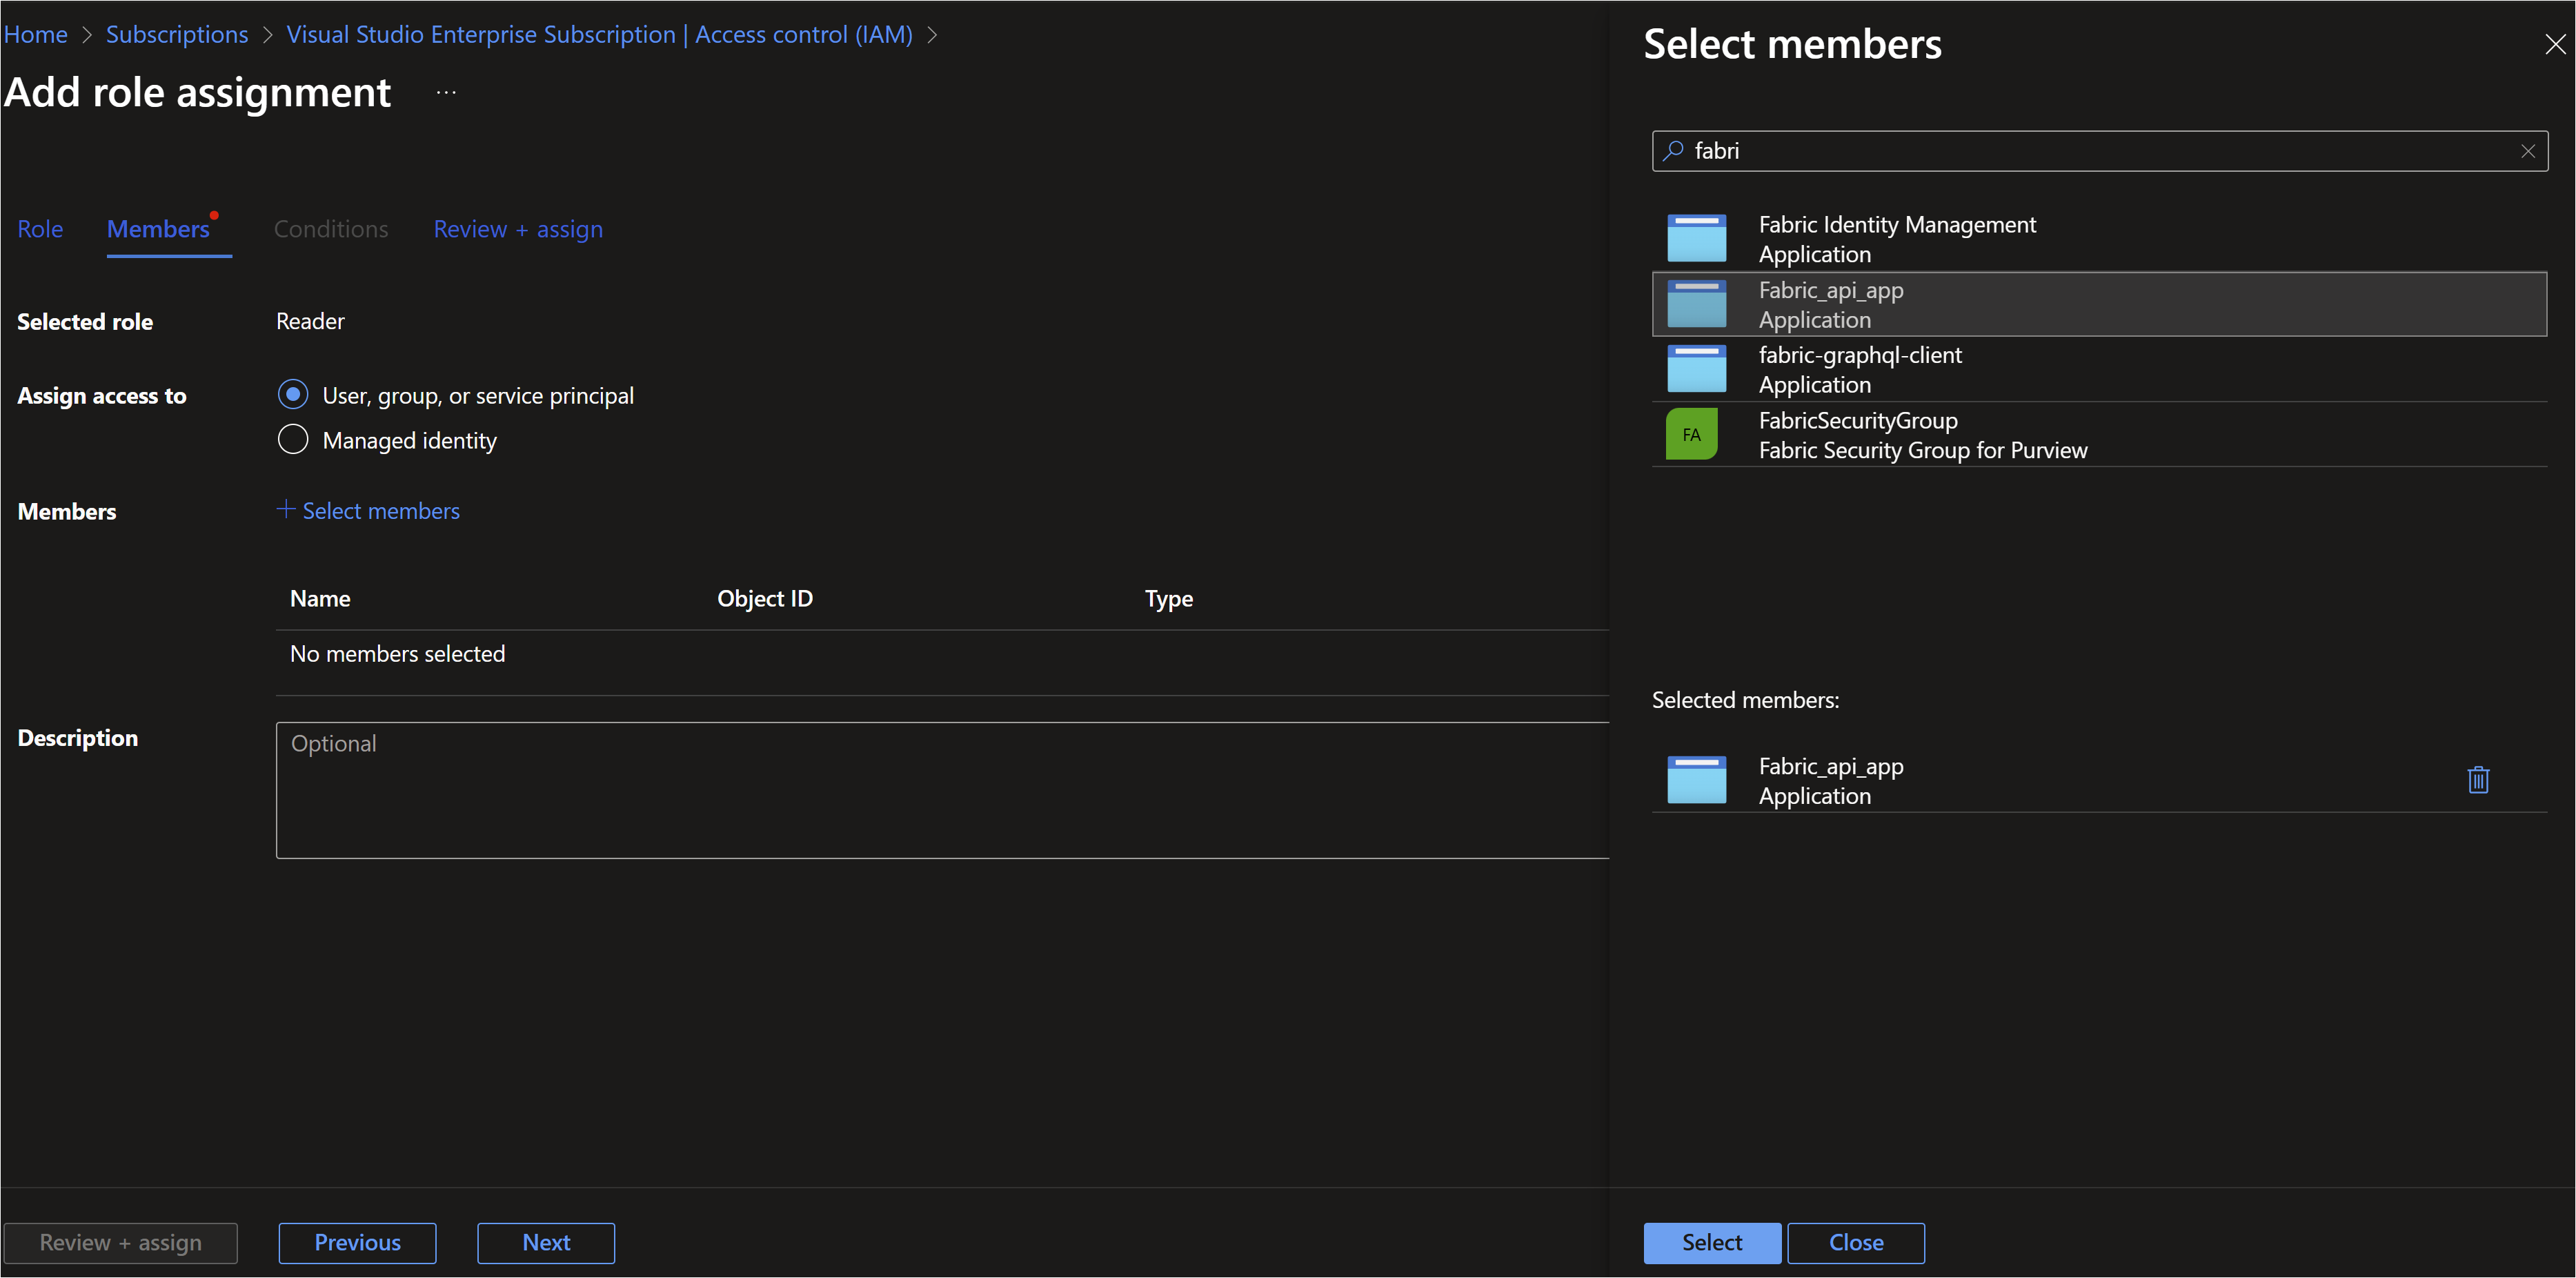
| 1.5 | Grant Service Account the ‘Reader’ role on the Subscription | See section 4.1.1 Grant Service Account the Subscription access |
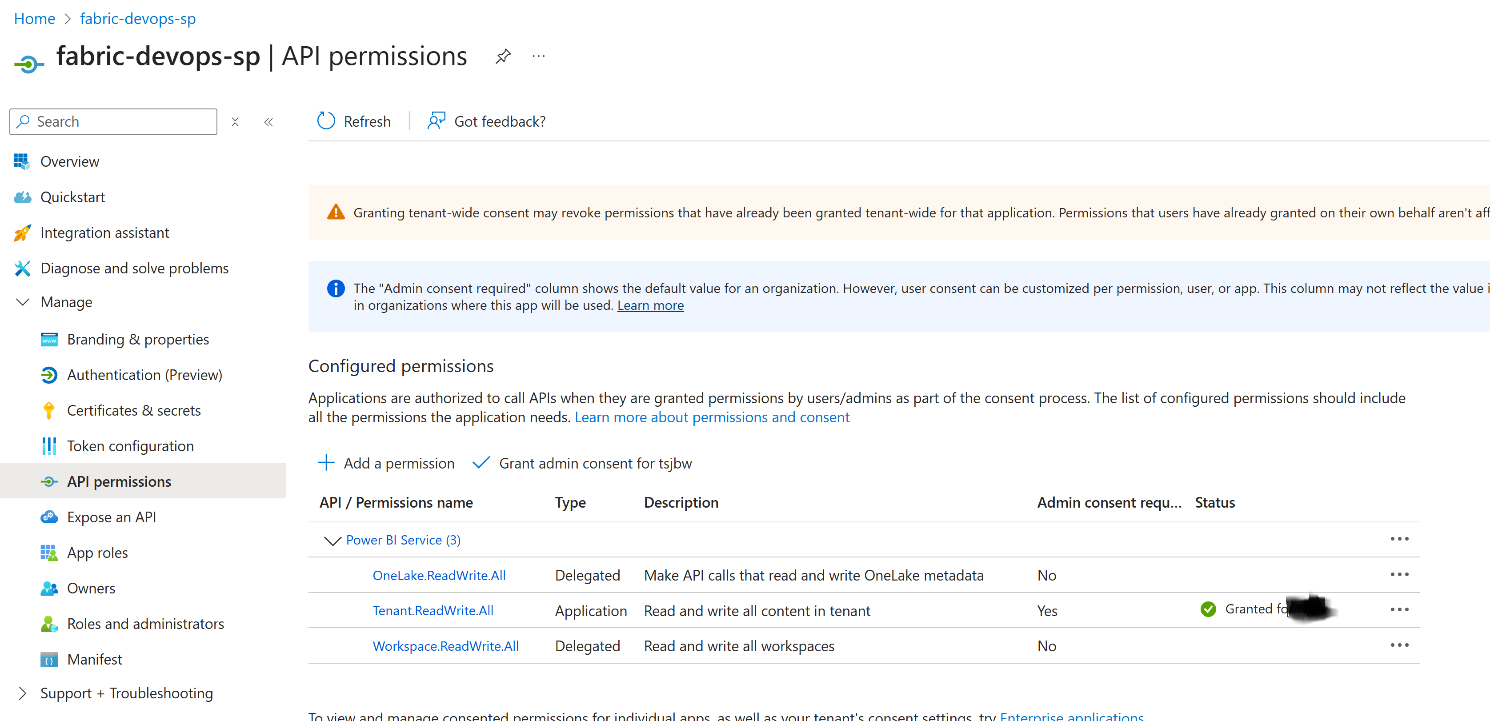
Figure 1 Example: SPN Permissions in Azure Entra
Grant Service Account the Subscription access
Go to Azure Portal 🡪 Subscription 🡪 Select the subscription you want to use 🡪 Access Control(IAM) 🡪 Add
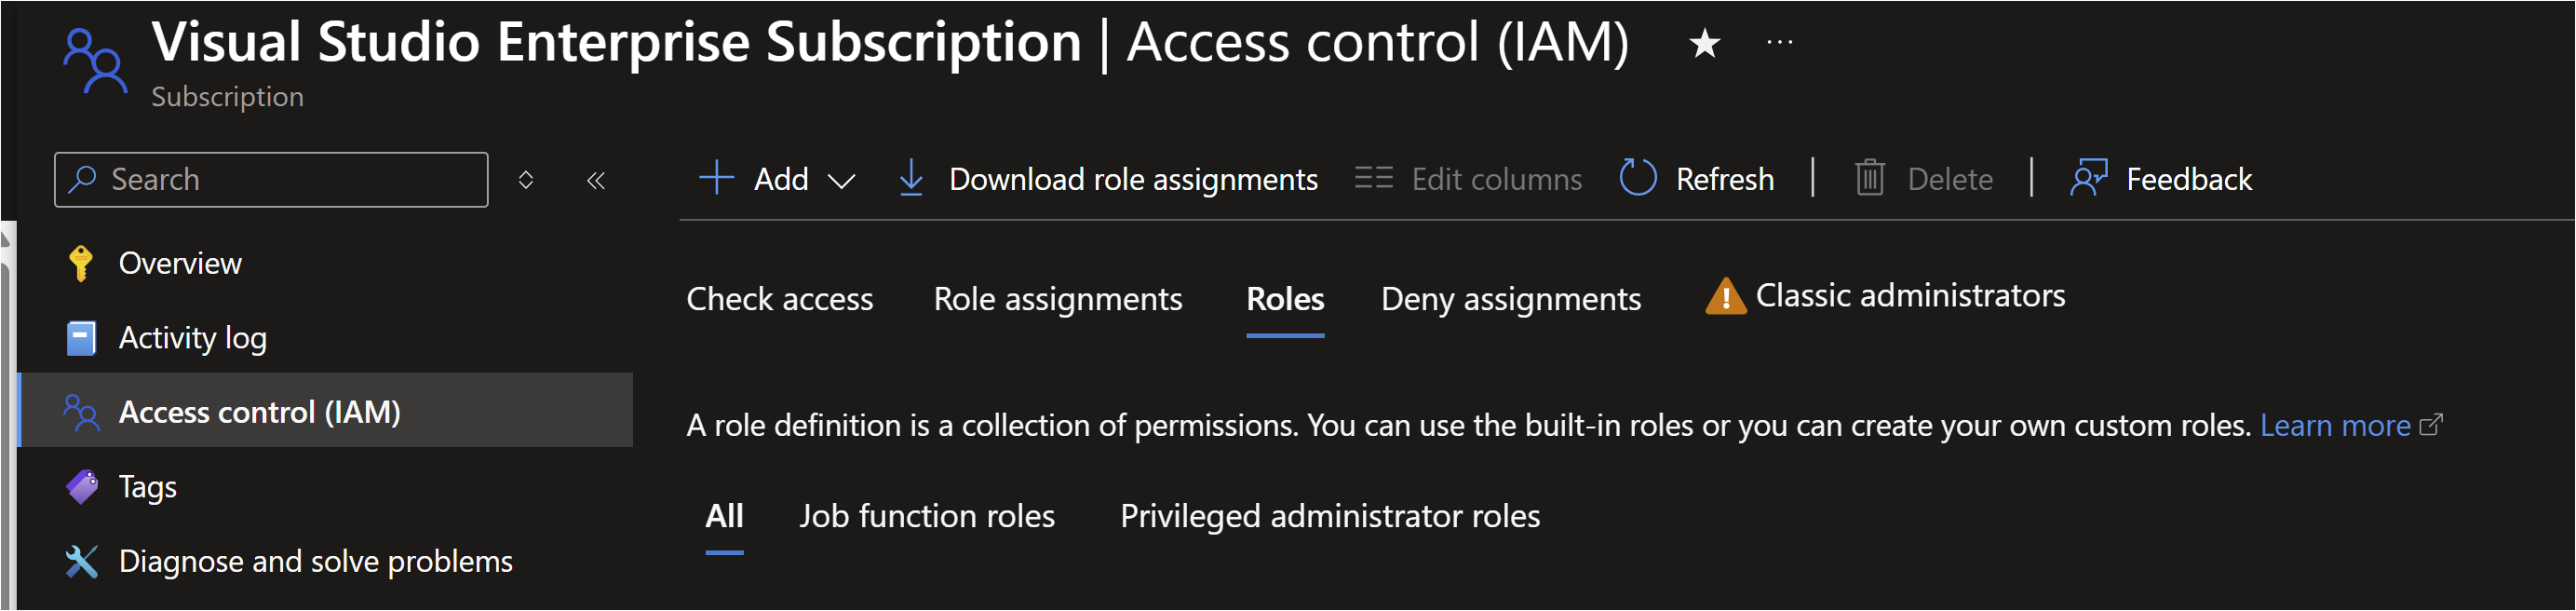
Select ‘Reader’ role 🡪 Next
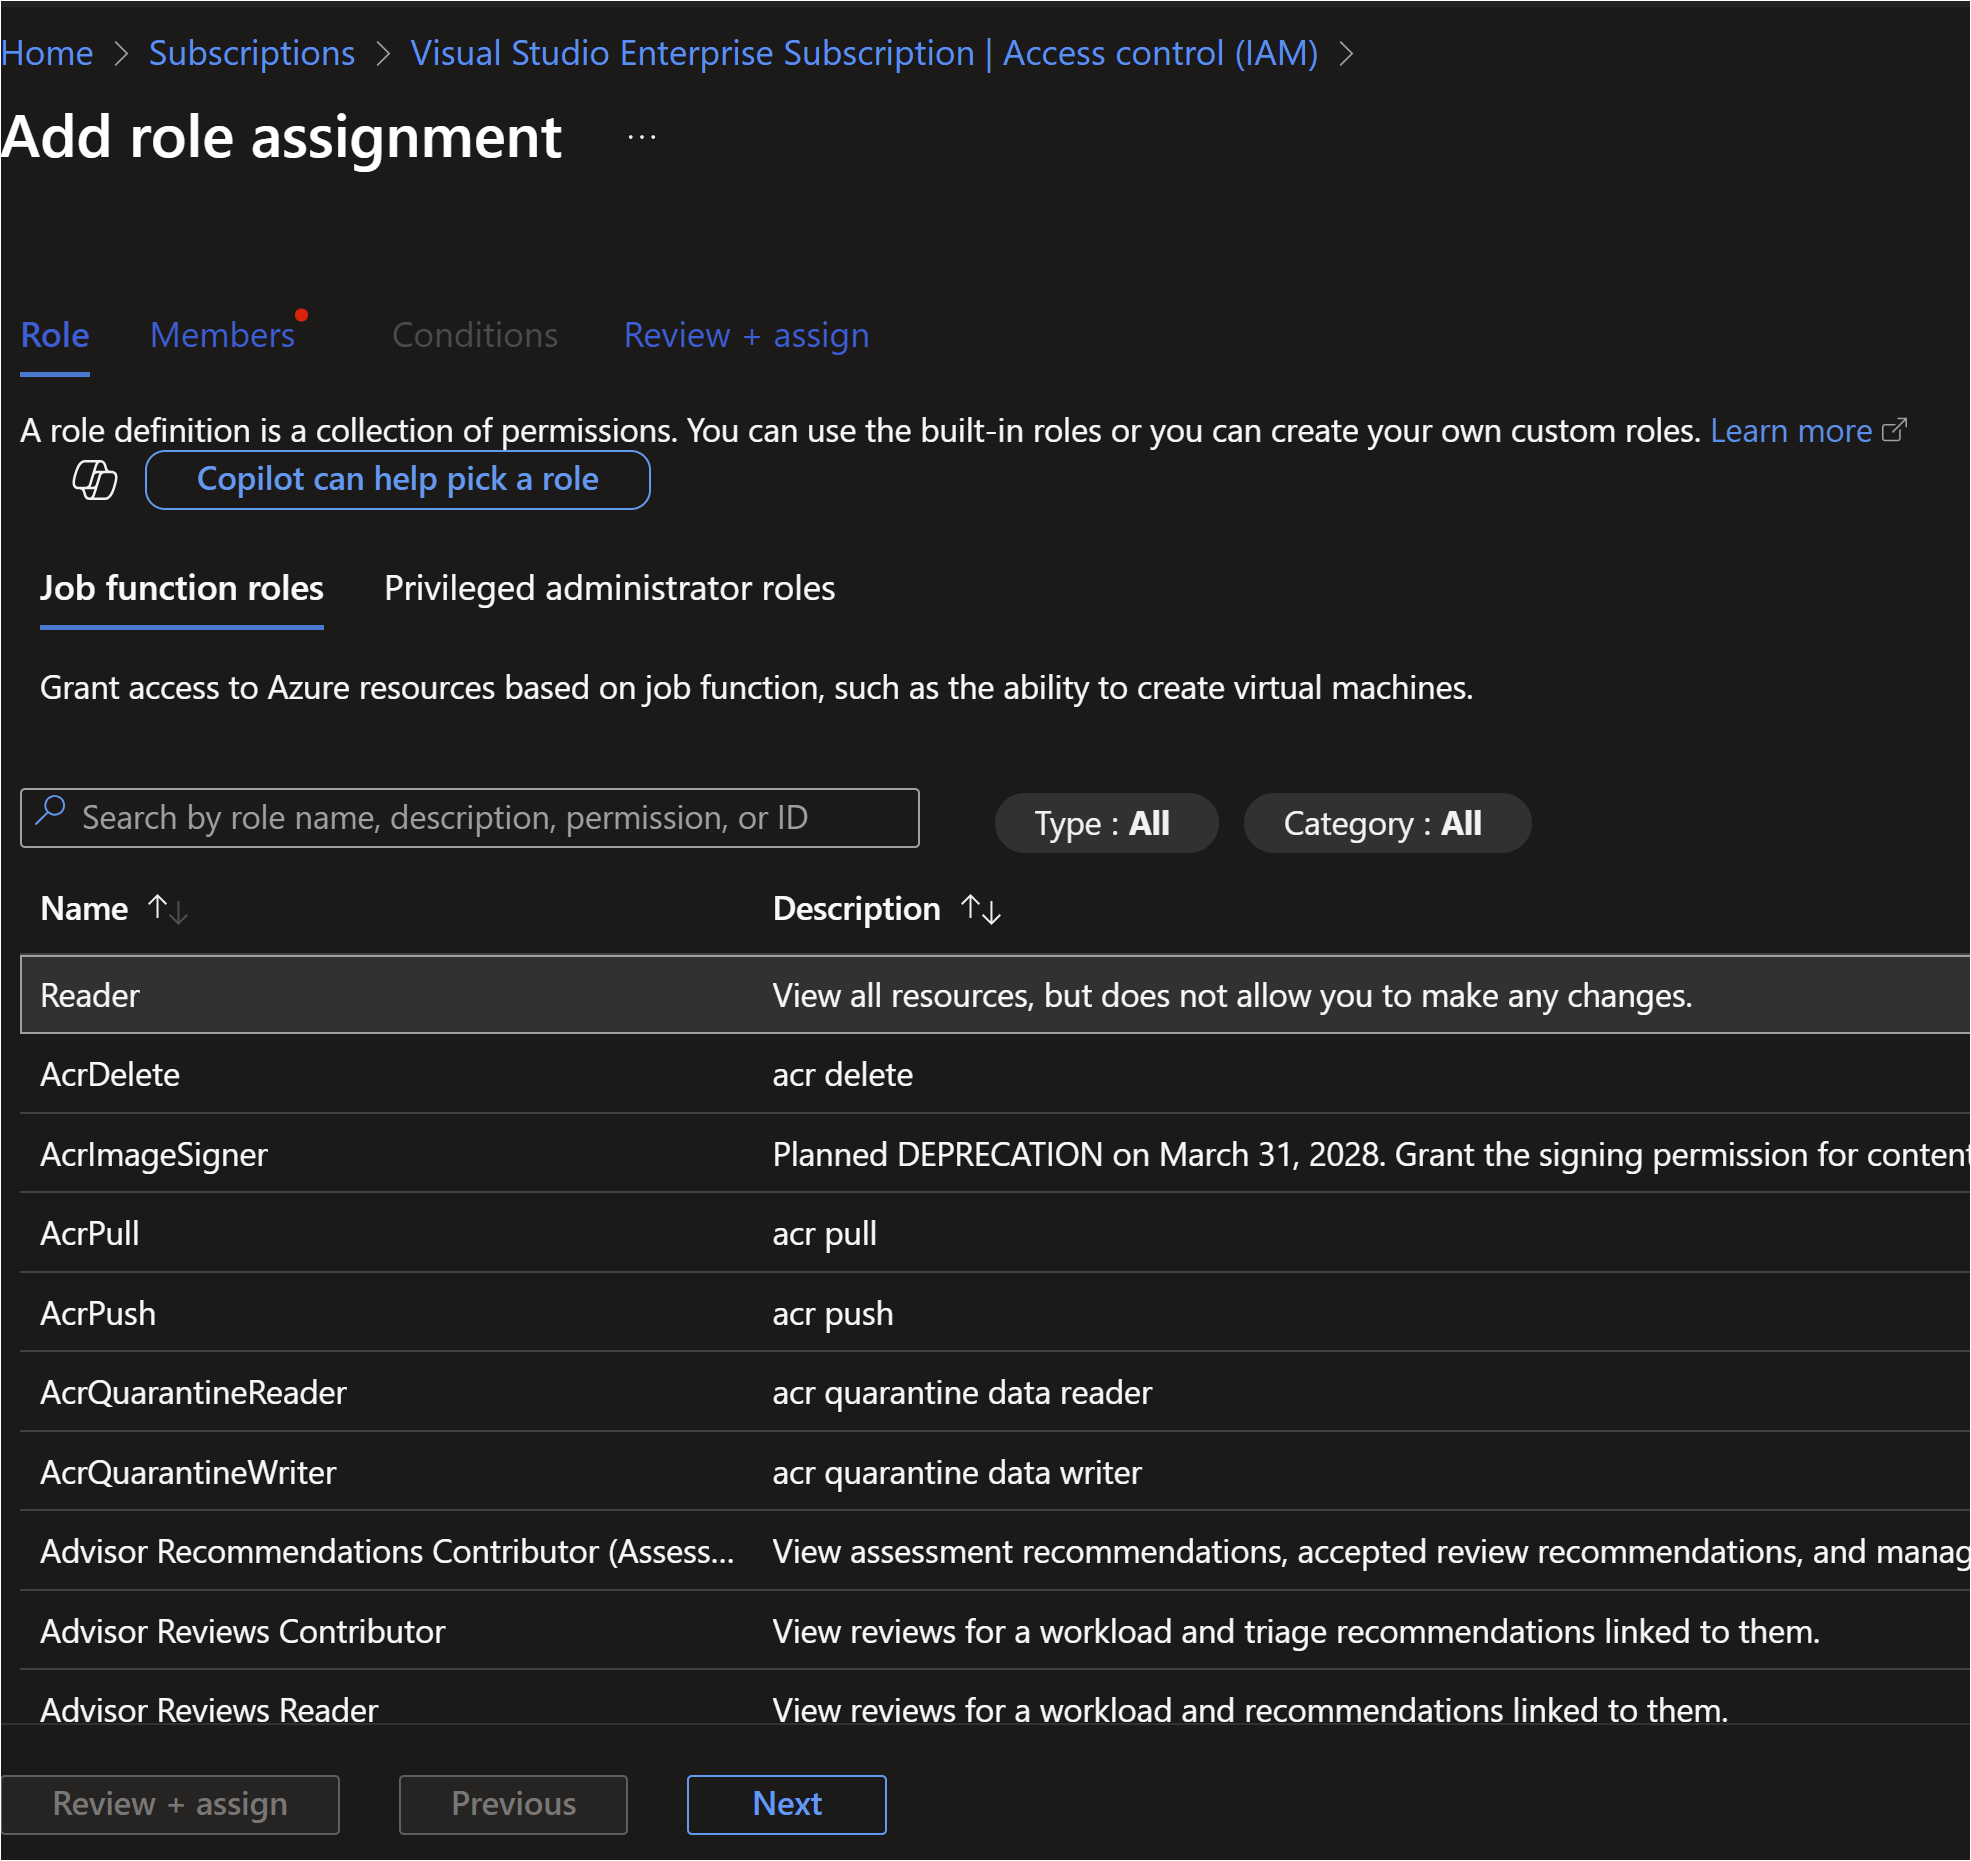
Select ‘User, Group or Service Principal’🡪 Find the SPN name from search box 🡪 click the account 🡪 Click ‘Select’
Phase 2: Configure Tenant Settings in Microsoft Fabric
The Service Principal must be granted permission both at the tenant level (Admin setting) and the workspace level (Role assignment).
A. Fabric Admin Portal Configuration (Tenant Level)
 Sign in to the Fabric admin portal( https://app.powerbi.com/admin-portal ) as Fabric Admin. This step ensures that SPNs are generally allowed to interact with Fabric APIs.
| Step | Action | Details |
| 2.1 | Access Admin Settings | In the Microsoft Fabric portal, go to Settings → Admin Portal → Tenant settings. |
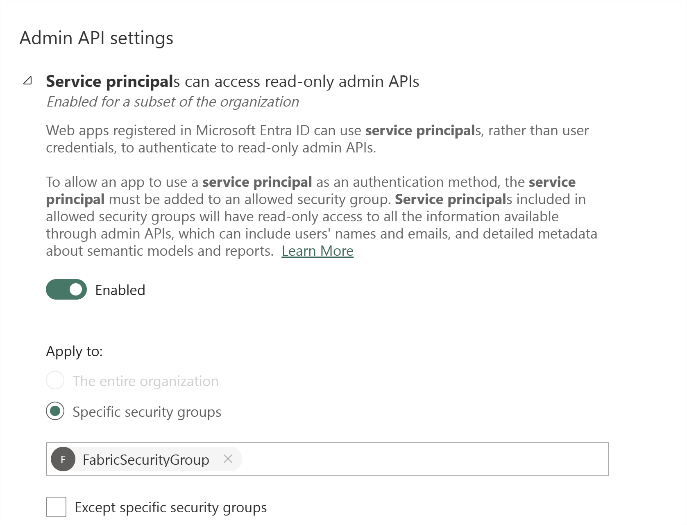
| 2.2 | Enable API Access | * Locate the setting "Service principals can use Fabric APIs" (often under "Developer settings"). Turn it ON. * Locate the setting “Service principals can access admin APIs used for update”. Turn it ON. |
| 2.3 | Apply Security Group | If you restrict this setting to specific security groups, ensure your newly created Service Principal is added to that group. |
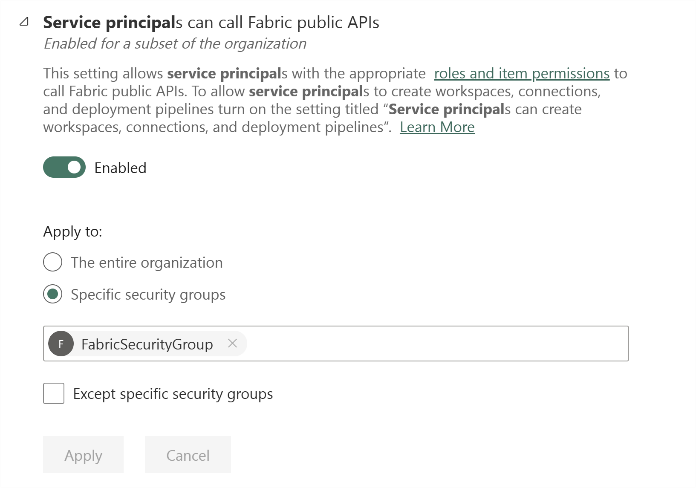 Figure 2 Example: o Service principals can access read-only admin APIs
Figure 3 Example: Service principals can access admin APIs used for update
B. Workspace Role Assignment (Control Plane Permissions)
The SPN needs a role on every source and target workspace in your deployment pipeline (e.g., Dev, Test, Prod).
| Step | Action | Details |
| 2.4 | Navigate to Workspace | In the Fabric portal, go to the target workspace (e.g., "Dev"). |
| 2.5 | Grant Access | Click Manage access or Workspace settings → Workspace access → Add people or groups. |
| 2.6 | Assign Role | Search for the name of your Service Principal (fabric-cicd-spn). Assign it the Contributor or Admin role (Contributor is usually sufficient for deployment tasks). Repeat this for all relevant workspaces. |
Phase 3: Create the Service Connection (Azure DevOps)
This connects the Service Principal's identity to your Azure DevOps project, allowing pipelines to authenticate.
| Step | Action | Details |
| 3.1 | Navigate to Project Settings | In Azure DevOps, go to your project → Project settings (bottom left). |
| 3.2 | Start New Connection | Select Service connections → New service connection. |
| 3.3 | Select Connection Type | Choose Azure Resource Manager (recommended, although the pipeline ultimately calls the Fabric API, using this type correctly handles the SPN credentials). Select Service principal (manual). |
| 3.4 | Enter Authentication Details | In the manual setup form, enter the following: |
| Subscription ID | If your Fabric capacity is tied to a specific Azure subscription, enter it here. Otherwise, you may choose 'Management Group' or 'All subscriptions'. | |
| Subscription Name | The name associated with the Subscription ID. | |
| Service principal ID | The Application (client) ID from Phase 1.2. | |
| Service principal key | The Secret Value from Phase 1.3. | |
| Tenant ID | The Directory (tenant) ID from Phase 1.2. | |
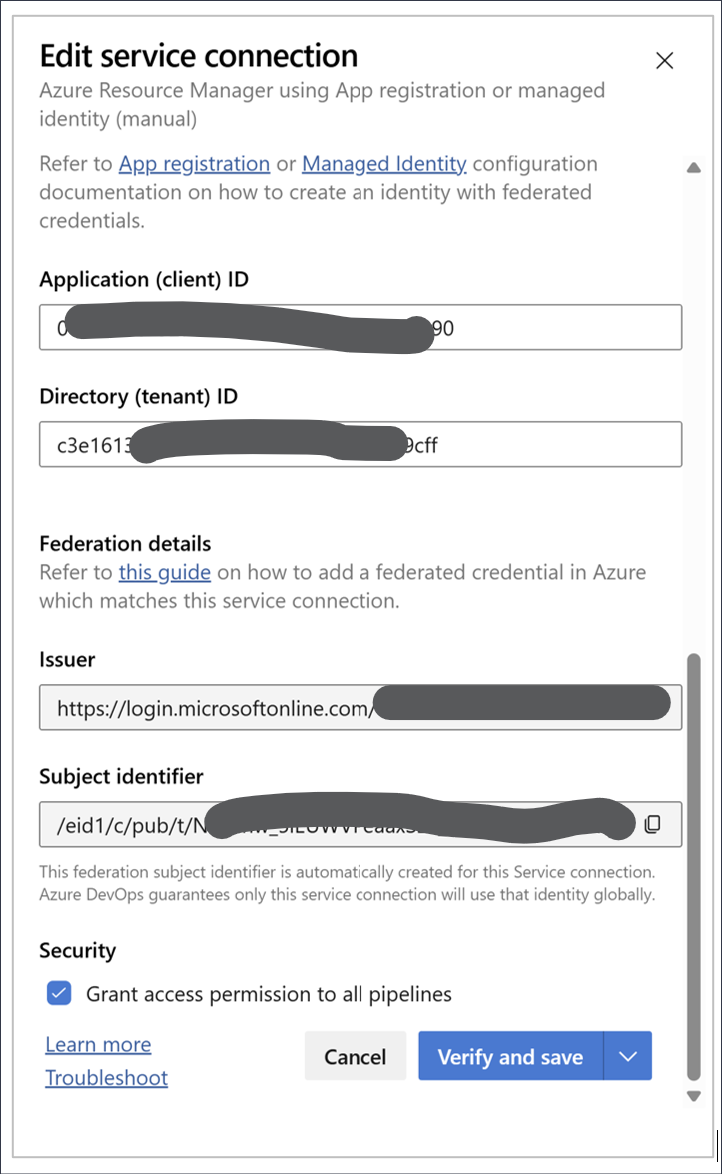
| 3.5 | Name the Connection | Give it a clear name (e.g., Fabric-CICD-SPN-Connection). This is the name you will reference in your YAML pipeline. |
| 3.6 | Verify and Save | Select Verify and save. The verification should pass if the SPN is active and the credentials are correct. |
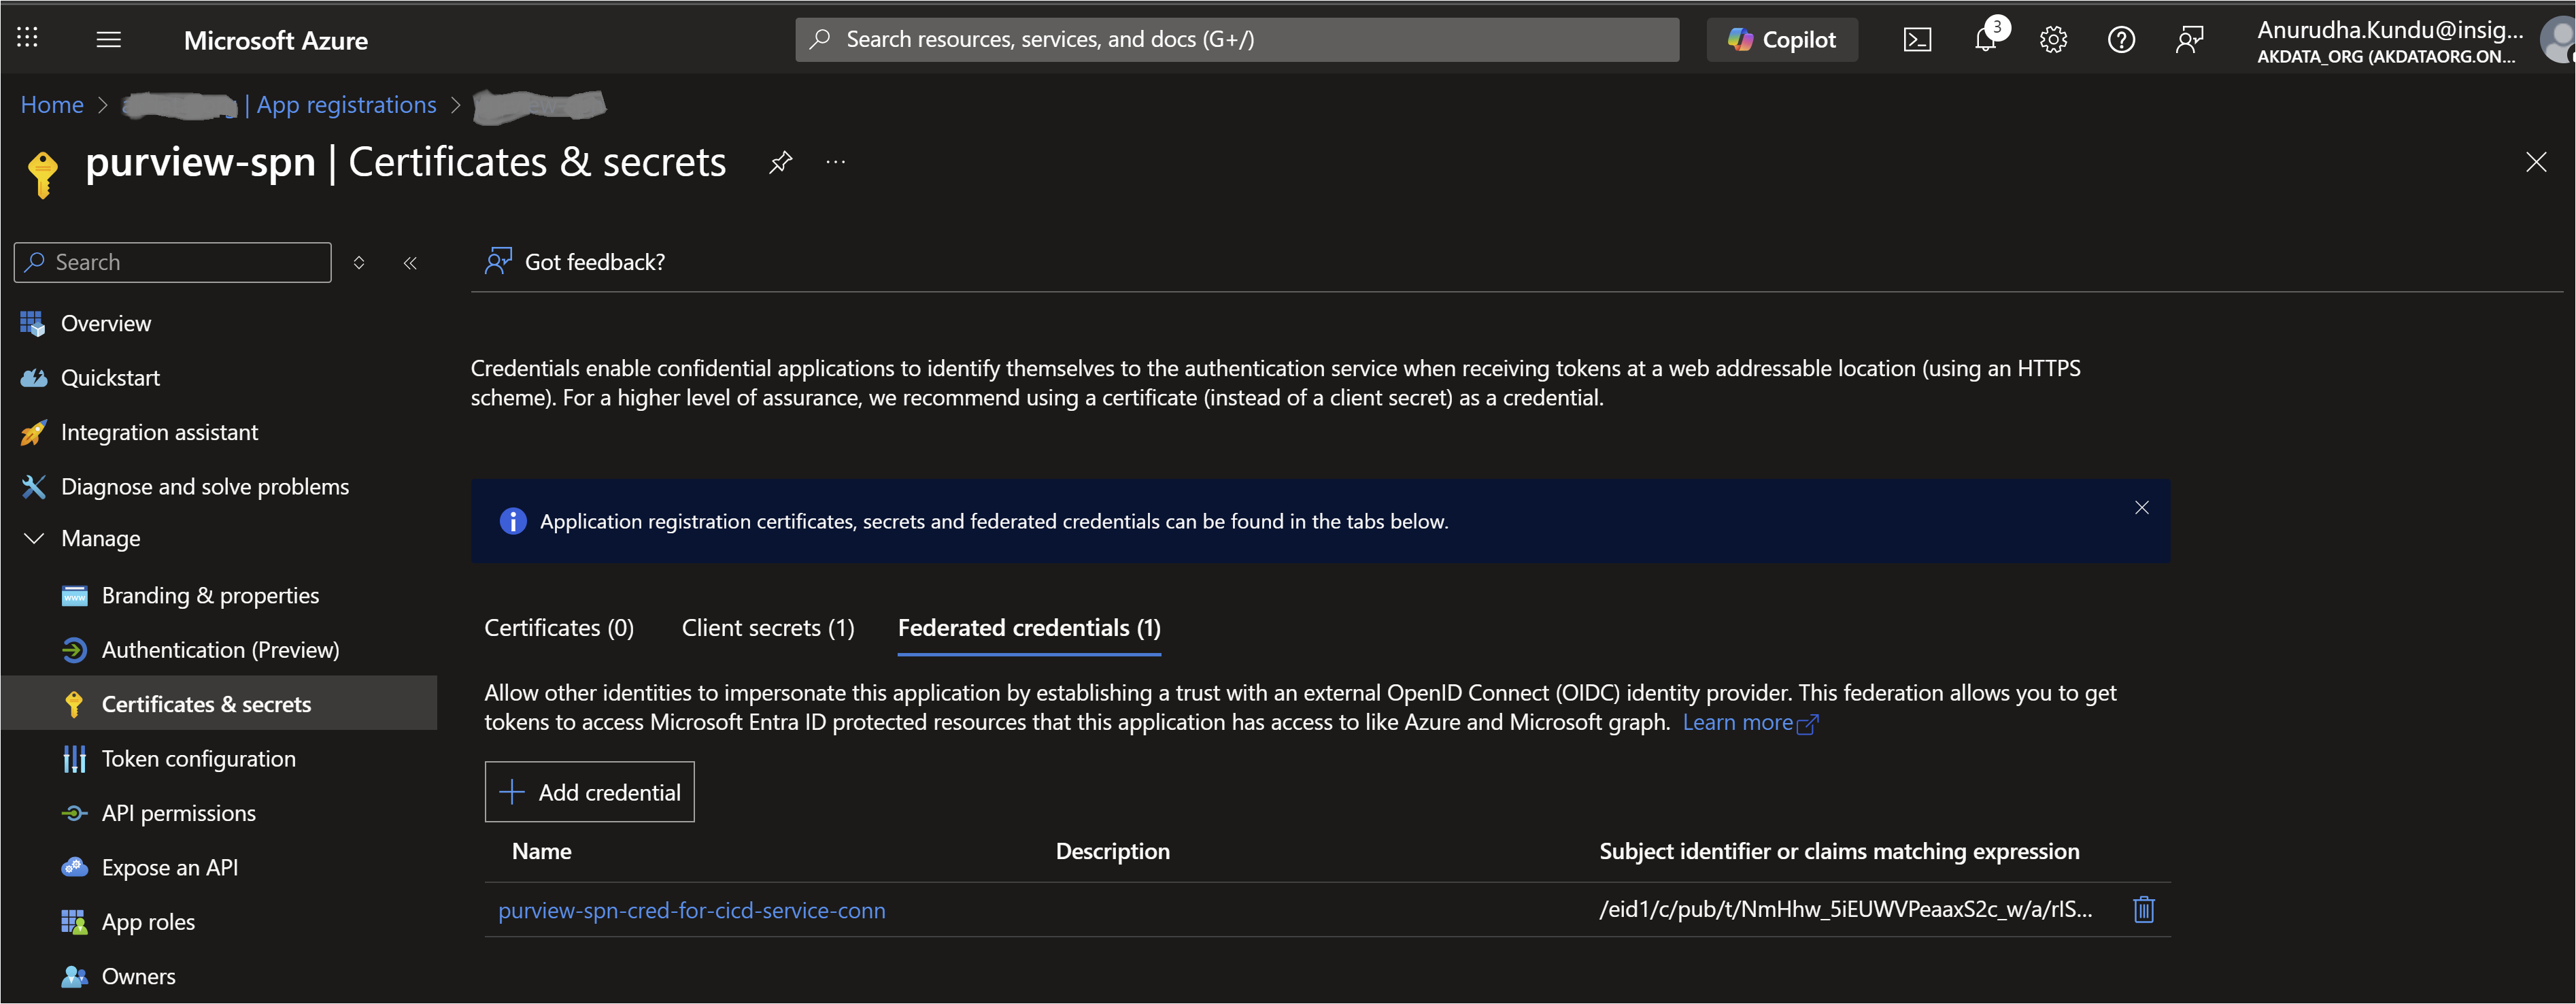
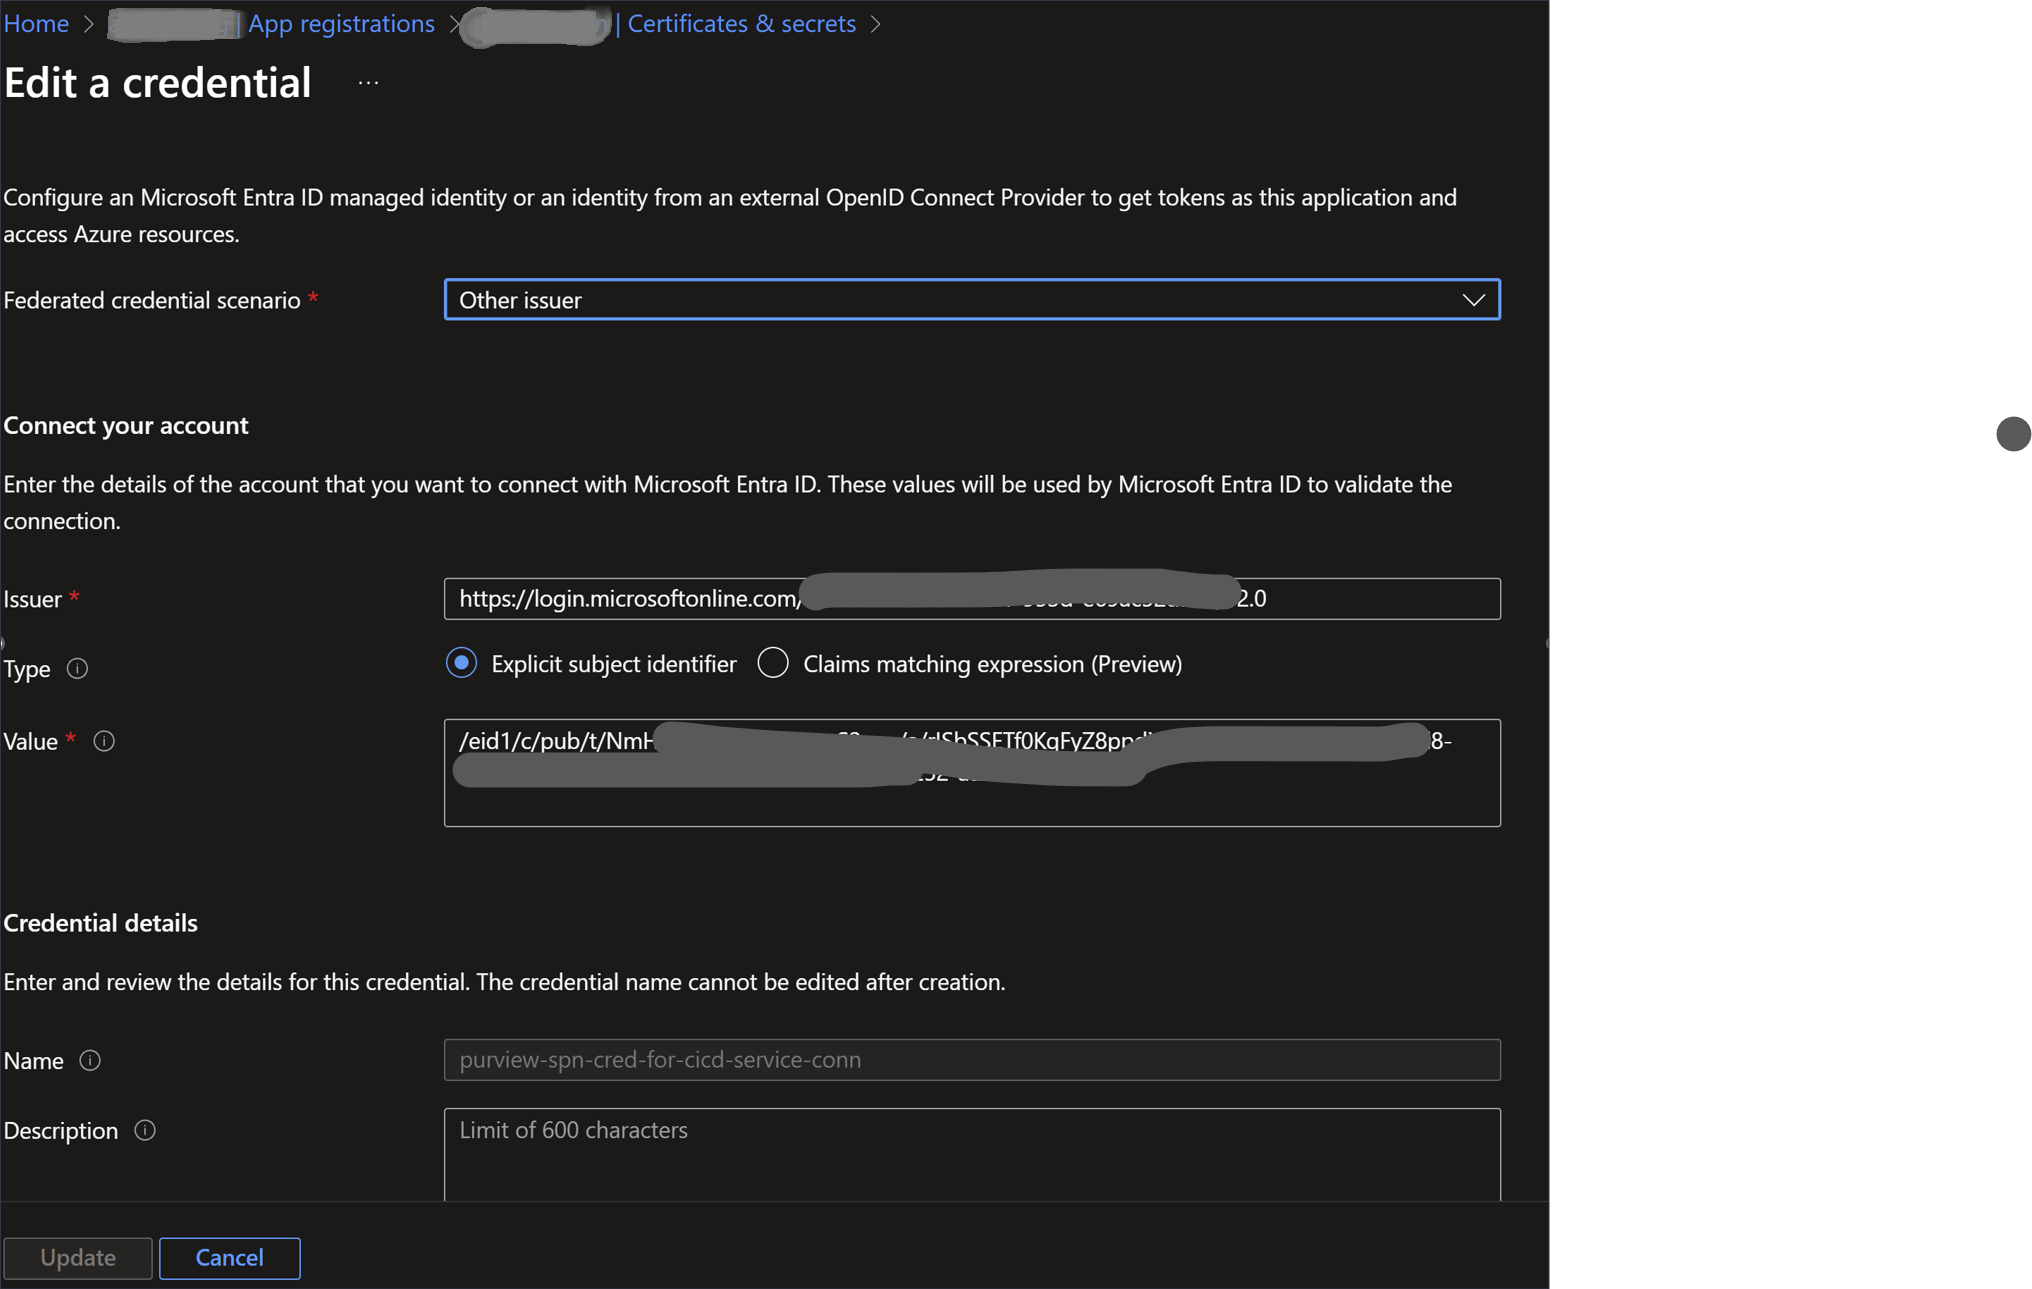
Grant Federated Credential Permission
Open the SPN in the Azure Portal🡪 Certificate & Select 🡪 Go to ‘Federated credentials’ tab 🡪 ‘Add Credential’
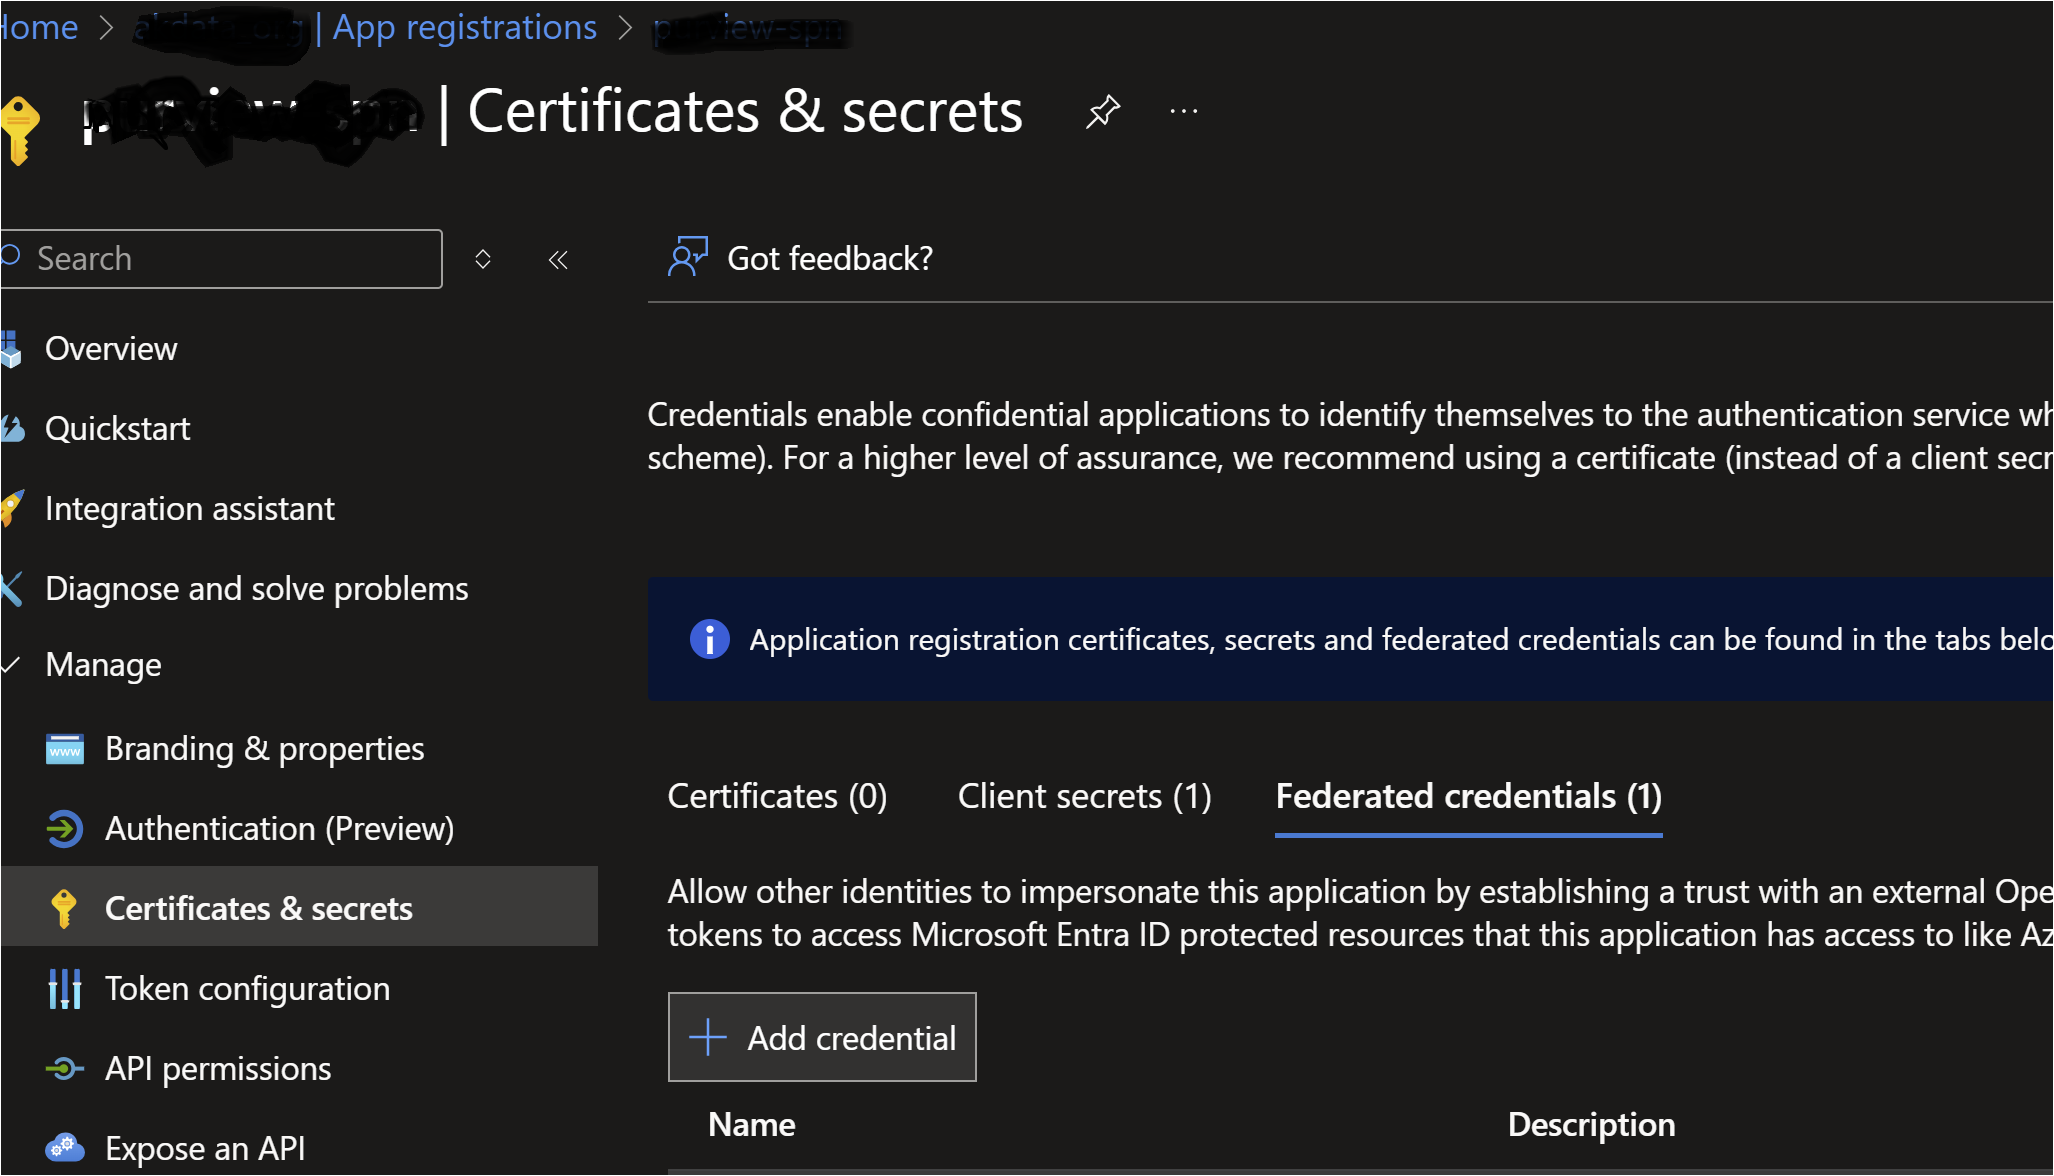
Fill the details. You need to get the Issuer and Subject details from Azure DevOps portal and use here.
Phase 4: Configure Repository Security for the Build Service
When a pipeline runs, it uses an identity called the Project Collection Build Service ([YourProjectName] Build Service ([YourOrganization])). This identity must have permission to use the Service Connection created in Phase 3.
| Step | Action | Details |
| 4.1 | Access Service Connection Security | Go back to Project settings → Service connections. Select the connection you just created (Fabric-CICD-SPN-Connection). |
| 4.2 | Set Pipeline Permissions | Select the Security tab. |
| 4.3 | Grant 'User' Role | Locate the Project Collection Build Service user (e.g., [Fabric-Project] Build Service) and ensure it has the User role. |
| 4.4 | Authorize Pipeline Use | Option A (Recommended): After the pipeline fails its first run (due to lack of permission), a banner will appear asking you to permit the use of the resource. Select Permit. |
| Option B (Less Secure): On the Service Connection's Security tab, you can select the checkbox to Grant access permission to all pipelines. Only use this if you fully trust all pipelines in the project. |
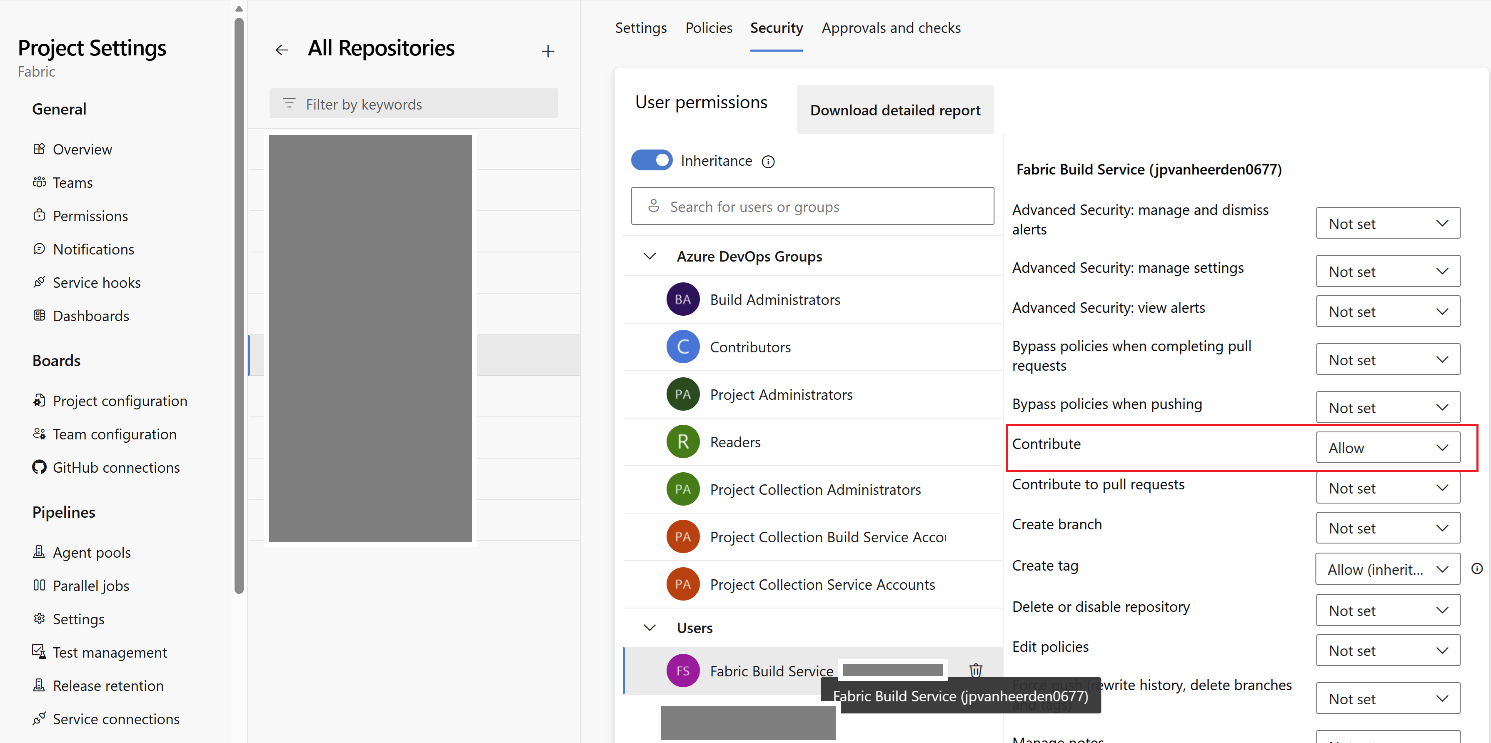
Figure 4 Example: Repository access for SPN